
A leaking or draughty patio door is one of those problems that gets worse every winter you ignore it. If you're researching patio door installation, you're probably weighing up whether this is a weekend DIY project or a job that needs a professional crew, and how much either route will cost you before the snow arrives.
Here's the short answer: patio door installation is doable yourself if you're comfortable with framing and levelling, but it's unforgiving work. A door that's out of square by even a few millimetres will leak air, stick, or fail its seal warranty within a year. This guide walks through the actual steps, from removing the old unit to shimming, insulating, and testing the new door, plus what tools and time you'll need, and where most homeowners run into trouble with sliding glass doors especially.
We've installed thousands of patio doors across Ontario since 2006, so this isn't theory. Read on for the full step-by-step process, realistic cost expectations, and honest advice on when calling in a licensed installer will save you more than it costs.
What to know before installing a patio door
Before you pull the old door out, get honest with yourself about scope. Patio door installation isn't like hanging an interior door. You're dealing with a heavy glass unit, a rough opening exposed to the elements, and a limited window before rain or snow gets into your house. Plan for a full day of work minimum, even for an experienced DIYer, and have a way to seal the opening overnight if you can't finish in one go.
Tools and materials you'll need
Gather everything before you start. Running to the hardware store mid-installation with the opening exposed is how walls get wet.
| Category | Items |
|---|---|
| Demolition | Reciprocating saw, pry bar, utility knife, hammer |
| Measuring | Tape measure, level (4-foot minimum), framing square |
| Installation | Shims, exterior-grade screws, drill/driver, caulking gun |
| Waterproofing | Flashing tape, house wrap, sill pan, low-expansion foam |
| Finishing | Exterior caulk, interior trim, insulation strips |
A second person is not optional. Sliding glass doors in particular can weigh well over 100 kg once assembled, and you need one person holding the unit plumb while the other checks levels and drives fasteners, whether you're fitting sliding or garden patio doors.
How long it actually takes
Most DIYers underestimate the time badly. Removing the old door and disposing of it takes an hour or two on its own, especially if it's been caulked and painted in place for a decade. Preparing and waterproofing the rough opening properly, not just slapping caulk around it, adds another two to three hours. Setting, shimming and securing the new door takes patience: rushing this stage is the single biggest cause of failed installations we see when we're called out to fix a botched DIY job.
A patio door that's out of level by even 3mm will bind, sag, or leak within a year, no matter how good the door itself is.
What patio door installation costs in Ontario
Expect professional installation to run anywhere from $800 to $2,500 depending on door size, materials, and whether structural changes are needed, a spread that tracks closely with installation pricing for Ontario homeowners on comparable window jobs. A standard 6-foot sliding glass door installation on an existing opening sits toward the lower end. Larger units, up to the 12-foot-wide configurations in our range of door styles for Ontario homes, cost more due to the extra framing and the crew size needed to manoeuvre them safely.
DIY installation saves labour costs but not much else; the door itself is usually 60 to 70 percent of the total project cost regardless of who installs it. Factory-direct pricing, which cuts out the retail markup, matters more to your bottom line than whether you swing the hammer yourself.
Deciding between DIY and hiring a professional
Ask yourself these questions honestly before committing to a DIY patio door installation:
- Have you framed or replaced a door before, or is this your first attempt?
- Is your rough opening square, or does the house have visible settling?
- Do you have a second person available for the full day?
- Can you complete the job in one day, given weather forecasts?
- Does your warranty require professional installation to stay valid?
That last point matters more than most homeowners realise. Many manufacturers, us included, tie warranty coverage to correct installation. If a DIY job introduces air or water leaks, you could void the very protection you're paying for. Our own professional installation service uses licensed, insured installers precisely because a poorly fitted door undermines everything else about the product, no matter how good the glass or frame is.
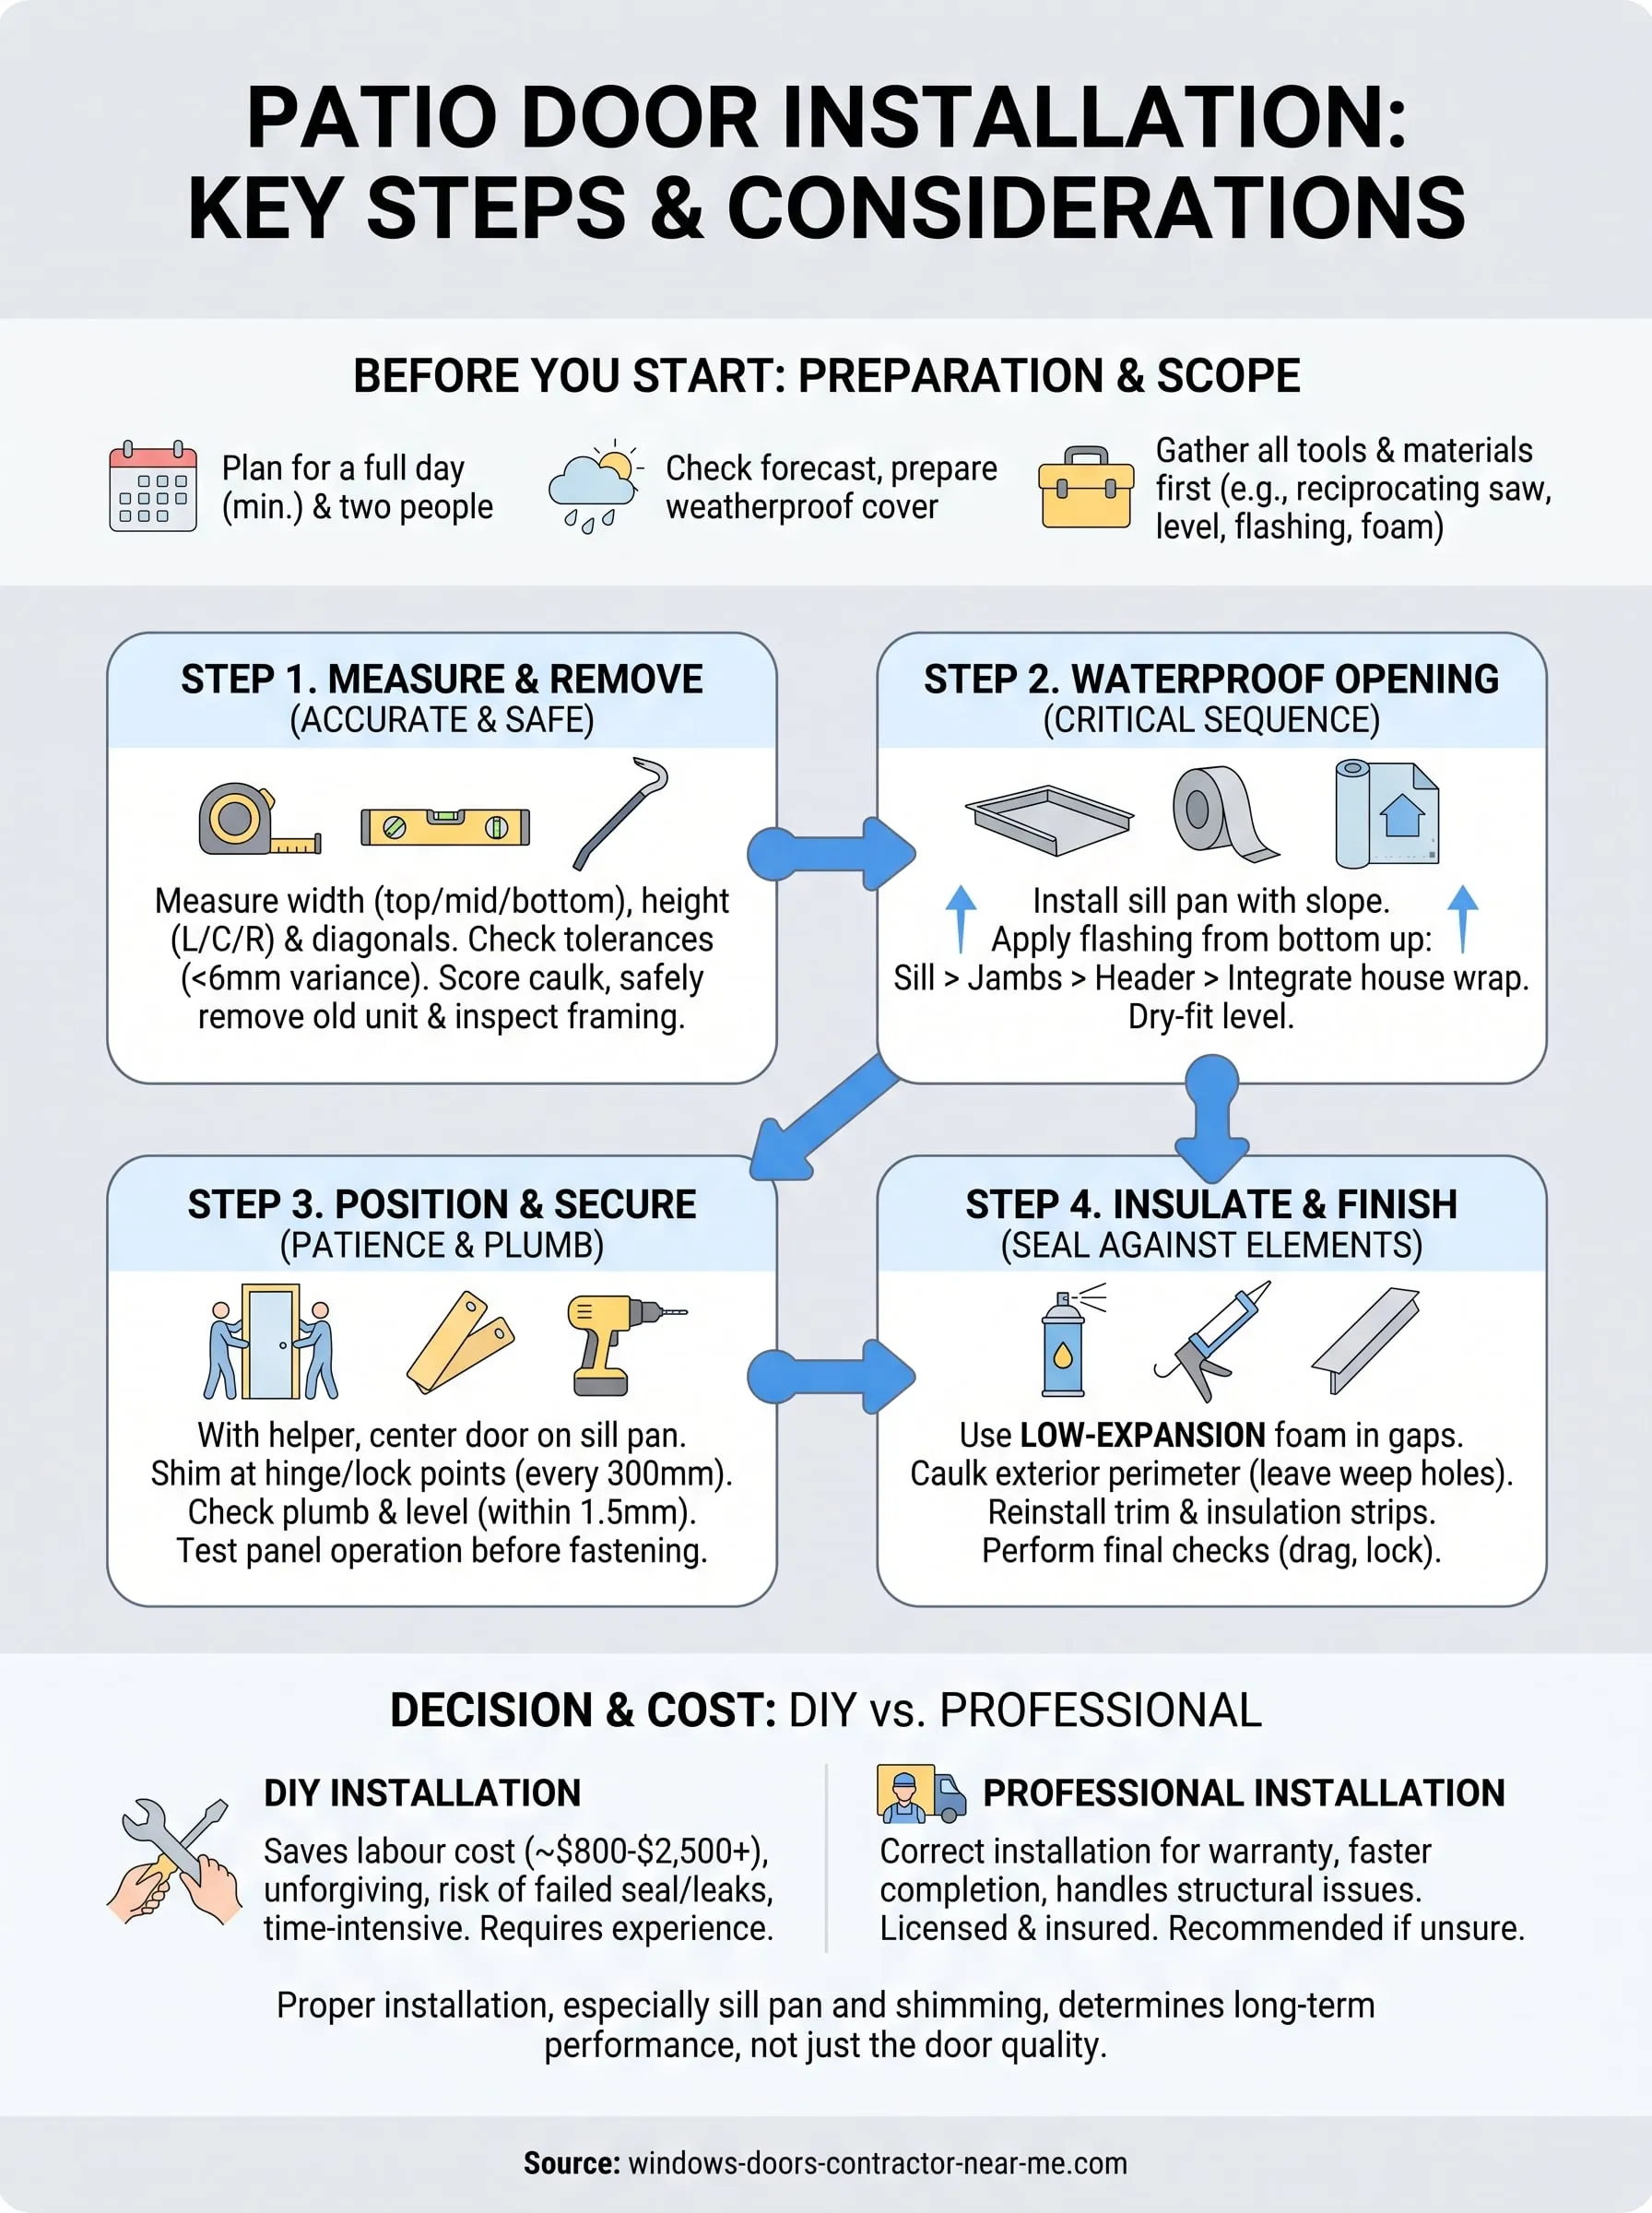
Step 1. Measure the opening and remove the old door
Getting the measurements right before you touch a pry bar saves you from ordering the wrong size door or discovering the opening won't work halfway through demolition. Measure the width at the top, middle, and bottom of the existing frame, then do the same for height on the left, centre, and right sides. Use the smallest width and smallest height measurement you find, since older openings are rarely perfectly square after years of settling.
Checking the rough opening
Most homeowners assume their opening is standard size, and it usually is, but framing shifts over 15 or 20 years. Compare your measurements against these tolerances before ordering:
| Measurement | Standard tolerance | Action if exceeded |
|---|---|---|
| Width variance | Under 6mm | Proceed as normal |
| Height variance | Under 6mm | Proceed as normal |
| Diagonal difference | Under 3mm | Confirms square opening |
| Diagonal difference | Over 6mm | Reframe before installing |
Measure both diagonals corner to corner. If they don't match within a few millimetres, your opening is out of square, and no amount of shimming later will fully compensate.
Removing the old door safely
Once measurements are locked in and the replacement door has arrived, start demolition. Score any caulk or paint sealing the old frame to the wall with a utility knife first, so you don't tear the surrounding drywall or siding when you pry it loose. Remove interior trim carefully if you plan to reuse it, since matching old trim profiles can be harder than expected.
Work the reciprocating saw through any screws or nails holding the frame in place, then use the pry bar at the corners to break the seal. Sliding glass doors are heavier than swing doors of the same size, so have your second person supporting the panel before the last fasteners come out. Set the old unit aside flat, not leaning, since a leaning glass panel is a shattering hazard.
Never leave the opening exposed overnight without a temporary weatherproof cover, even if rain isn't in the forecast.
Once the old door is out, inspect the framing members for rot, especially at the sill. Soft or discoloured wood here means you're doing more than a straight swap; you'll need to replace framing before the new patio door installation can proceed. This is the point where a lot of DIY jobs stall, and it's worth budgeting extra time for it rather than assuming the opening underneath is sound.
Step 2. Prepare and waterproof the rough opening
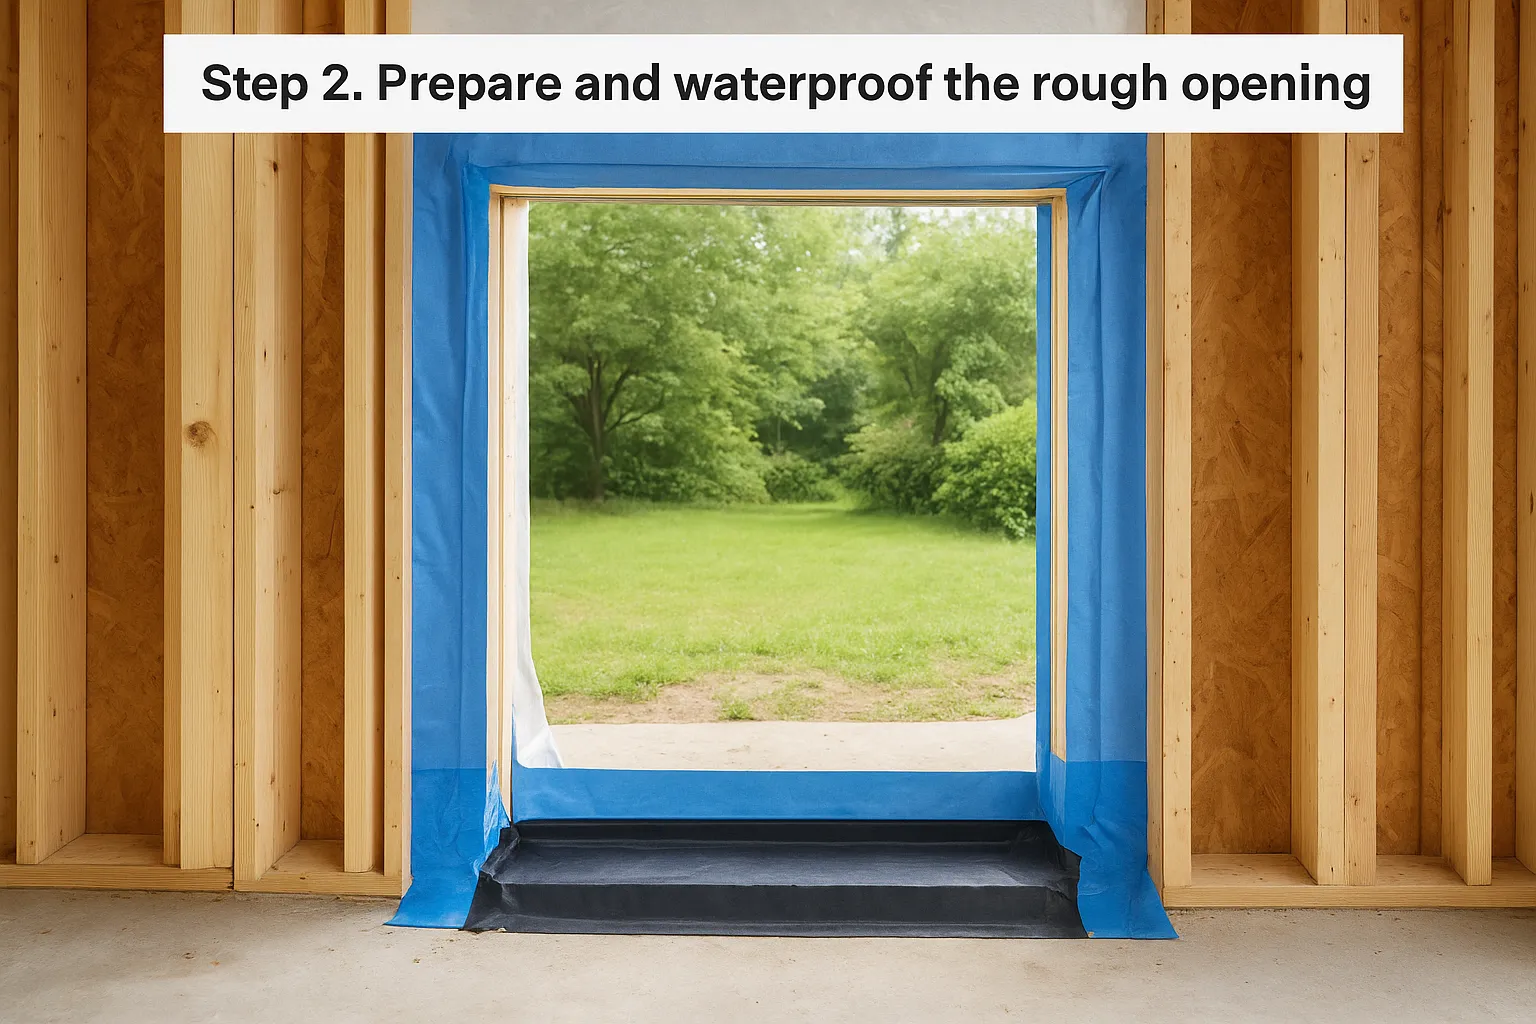
With the old door gone, you're staring at bare framing, and this is where most water damage originates years later if you rush it. Sweep out debris, pull any remaining nails, and check that the sill plate is level side to side. Waterproofing the rough opening properly now is cheaper than fixing rot behind a patio door in five years, and it's the step DIYers skip most often because the door itself isn't in place yet to show them why it matters.
Installing the sill pan
A sill pan is a rigid or flexible waterproof tray that sits under the door frame and directs any water that gets past the threshold back outside instead of into your subfloor. Cut it to fit the full width of the opening, extending up the side jambs by at least 100mm. Set it with a slight slope toward the exterior, even a couple of degrees, so gravity does the work rather than relying on caulk alone.
No amount of caulk will save a patio door installation with a flat or reverse-sloped sill.
Applying flashing tape and house wrap
Work from the bottom up, the same principle roofers use with shingles, so each layer sheds water onto the one below it rather than trapping it.
- Flash the sill first, wrapping tape up both side jambs by 50 to 75mm.
- Flash the side jambs next, overlapping the sill flashing.
- Flash the header last, overlapping the side jamb flashing.
- Integrate the house wrap around the opening so water sheds outward at every layer.
This sequencing matters more than the tape brand you buy. If you flash the header before the sides, water running down the wall gets funnelled straight behind your new sliding glass doors instead of away from them.
Checking the opening one last time
Before the new door goes anywhere near the opening, dry-fit a level across the sill and check the jambs for plumb with your 4-foot level. Confirm the opening is still square by re-measuring the diagonals, since removing the old frame sometimes shifts things slightly. If you spot gaps wider than 6mm between the framing and sheathing, pack them with low-expansion foam now, before the door is in place and inaccessible. Rushing past this check is exactly how installers end up chasing draughts months later, and it's far easier to fix a framing issue with the opening wide open than after the new patio door is shimmed and screwed into place.
Step 3. Position and secure the new patio door
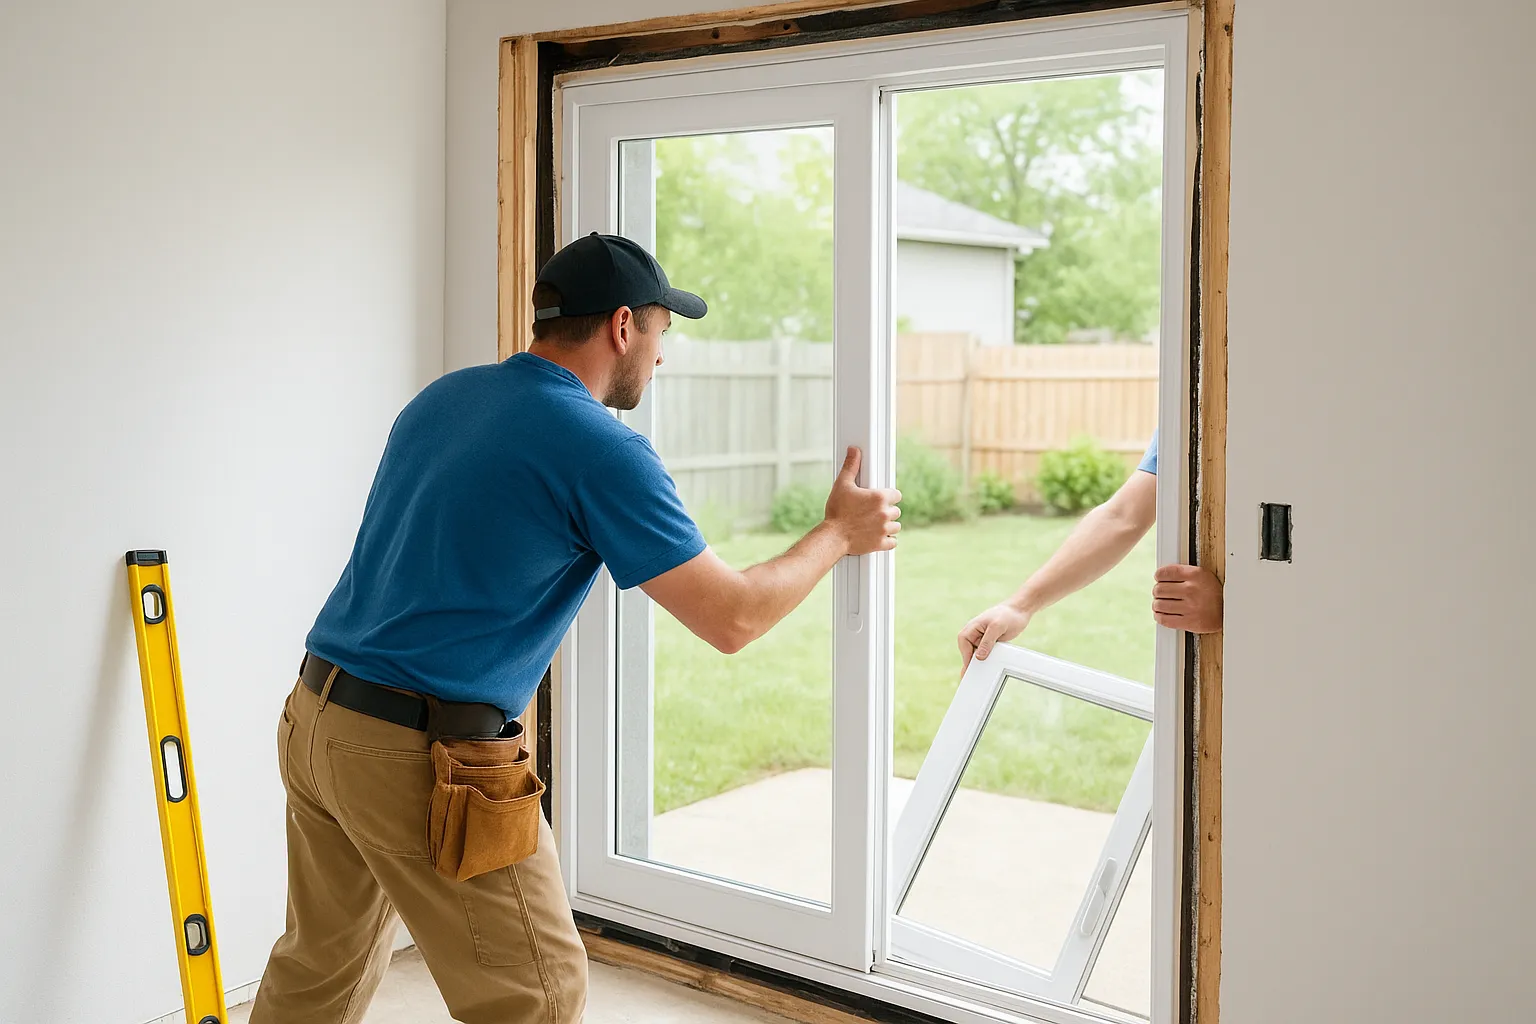
With the opening flashed and dry, you're ready to set the door itself, and this is the step where a second pair of hands stops being optional. Positioning the new patio door correctly the first time saves you from wrestling a heavy glass unit back out of the opening because it went in crooked. Have your helper support the weight from outside while you guide it into place from inside, keeping the frame tilted slightly until it clears the sill pan.
Setting the door into place
Lower the unit onto the sill pan gently, centring it side to side before it takes any weight. Rushing this part scratches the sill finish and can crack the pan itself.
- Dry-fit the door in the opening without fasteners first.
- Check that the sill sits flush and centred on the pan.
- Confirm the frame doesn't bind against the rough opening on either side.
- Tilt the top of the frame into the opening last, then let it settle flat.
Shimming and checking for square
Once the door sits in the opening, place shims at the hinge points, lock points, and every 300mm along the sill and jambs. Check plumb on both side jambs with your level, then check the header for level separately, since a door can be plumb on the sides and still tilted at the top.
| Check | Tool | Acceptable tolerance |
|---|---|---|
| Side jamb plumb | 4-foot level | 1.5mm over full height |
| Header level | 4-foot level | 1.5mm across width |
| Diagonal square | Tape measure | Under 3mm difference |
| Panel operation | Slide/swing test | Smooth, no drag |
Slide the operable panel back and forth, or swing it if it's a hinged patio door, before you drive a single screw. Adjust shims until it moves smoothly with no dragging or binding.
Fastening the frame
Drive exterior-grade screws through the pre-drilled holes in the frame and into the framing members, working from the bottom up and re-checking level after every screw. Don't over-tighten; a frame that's screwed too tight against uneven shims will bow inward and bind the sliding panel.
A patio door installed slightly out of square today becomes a door that won't lock properly in six months.
Re-test the panel operation once more after fastening. If it drags anywhere along the track, back off the nearest screws and reshim before moving to insulation.
Step 4. Insulate, seal and finish the installation
With the frame fastened and the panel sliding smoothly, the temptation is to call it done. Resist that. Insulating and sealing the installation properly is what stops draughts and condensation from showing up the first cold snap, and it's the difference between a door that performs for 20 years and one that needs recaulking every autumn.
Filling the gap between frame and framing
Gaps between the door frame and the rough opening need low-expansion foam, not the standard high-expansion stuff meant for larger cavities. Standard foam expands with enough force to bow the jambs inward, which binds the panel you just spent an hour adjusting. Fill gaps in short bursts, letting each pass cure before adding more, and leave the foam slightly under-filled rather than overflowing since it expands as it cures.
Use low-expansion foam around door frames; anything stronger can bow the jamb and undo your shimming work.
Sealing the exterior
Once the foam has cured, run a bead of exterior-grade caulk around the full perimeter where the frame meets the siding or brick. Tool the bead smooth with a wet finger or caulking tool so water sheds rather than pools. Check the manufacturer's instructions for your specific sliding glass doors, since some frame profiles need a weep hole left uncaulked to let trapped moisture drain back out.
Finishing the interior
Inside, reinstall or replace the trim you removed during demolition, then caulk the gap between trim and wall for a clean, draught-free finish. Add interior insulation strips along the track if your door didn't come with them pre-installed, since this is a common spot for cold air to sneak through even on a well-fitted door.
Final checks before you call it finished
Before you consider the job complete, run through this checklist:
- Slide or swing the panel through its full range at least ten times, checking for drag or noise
- Check the lock engages smoothly without needing to lift or force the panel
- Run a hand along the interior frame on a cold or windy day to feel for draughts
- Inspect the exterior caulk line after 24 hours for cracking or shrinkage
- Confirm weep holes, if present, are clear and unobstructed
A door that passes all five checks is properly installed. If anything feels off, particularly drag on the track or a lock that needs persuading, go back and reshim before the finish work locks everything in place permanently.
Enjoying your new patio door
Get the sill pan sloped, the flashing sequenced properly, and the shims set before you fasten anything, and your new door will outlast the caulk you used to seal it. Patio door installation rewards patience far more than skill; most failed jobs we're called out to fix went wrong because someone rushed the shimming or skipped the sill pan, not because they lacked the tools.
Granted, a full weekend with a helper and the checklist above gets most homeowners a tight, draught-free result. But if your opening is out of square, your framing shows rot, or you'd rather not risk a warranty on a first attempt, that's exactly the situation licensed installers exist for.
We've fitted thousands of these doors across Ontario since 2006, including plenty of botched DIY repairs. If you'd rather skip the risk altogether, book a free patio door installation quote with our crew and get it right the first time.