
A stiff handle, a lock that won't catch, or a window that rattles in the wind usually means the hardware has worn out, not the whole window. If you're searching for locks for casement windows, you're probably dealing with one of these problems and wondering whether to repair it yourself or call in help. The good news is that most casement window locks are straightforward to replace once you know which type you have.
This guide answers the practical question: which lock fits your window, and how do you swap it out safely. We'll walk through the common casement windows lock styles, from cam locks to multi-point hardware, and explain how to measure and match replacement parts so you don't order the wrong ones. You'll also get a clear, step-by-step process for removing the old hardware and fitting the new one.
We've fitted and repaired windows across Simcoe county and GTA since 2006, and worn-out window locks for casement windows are one of the most common calls we get. Read on for the choices and the installation steps, or reach out if you'd rather leave it to a licensed installer.
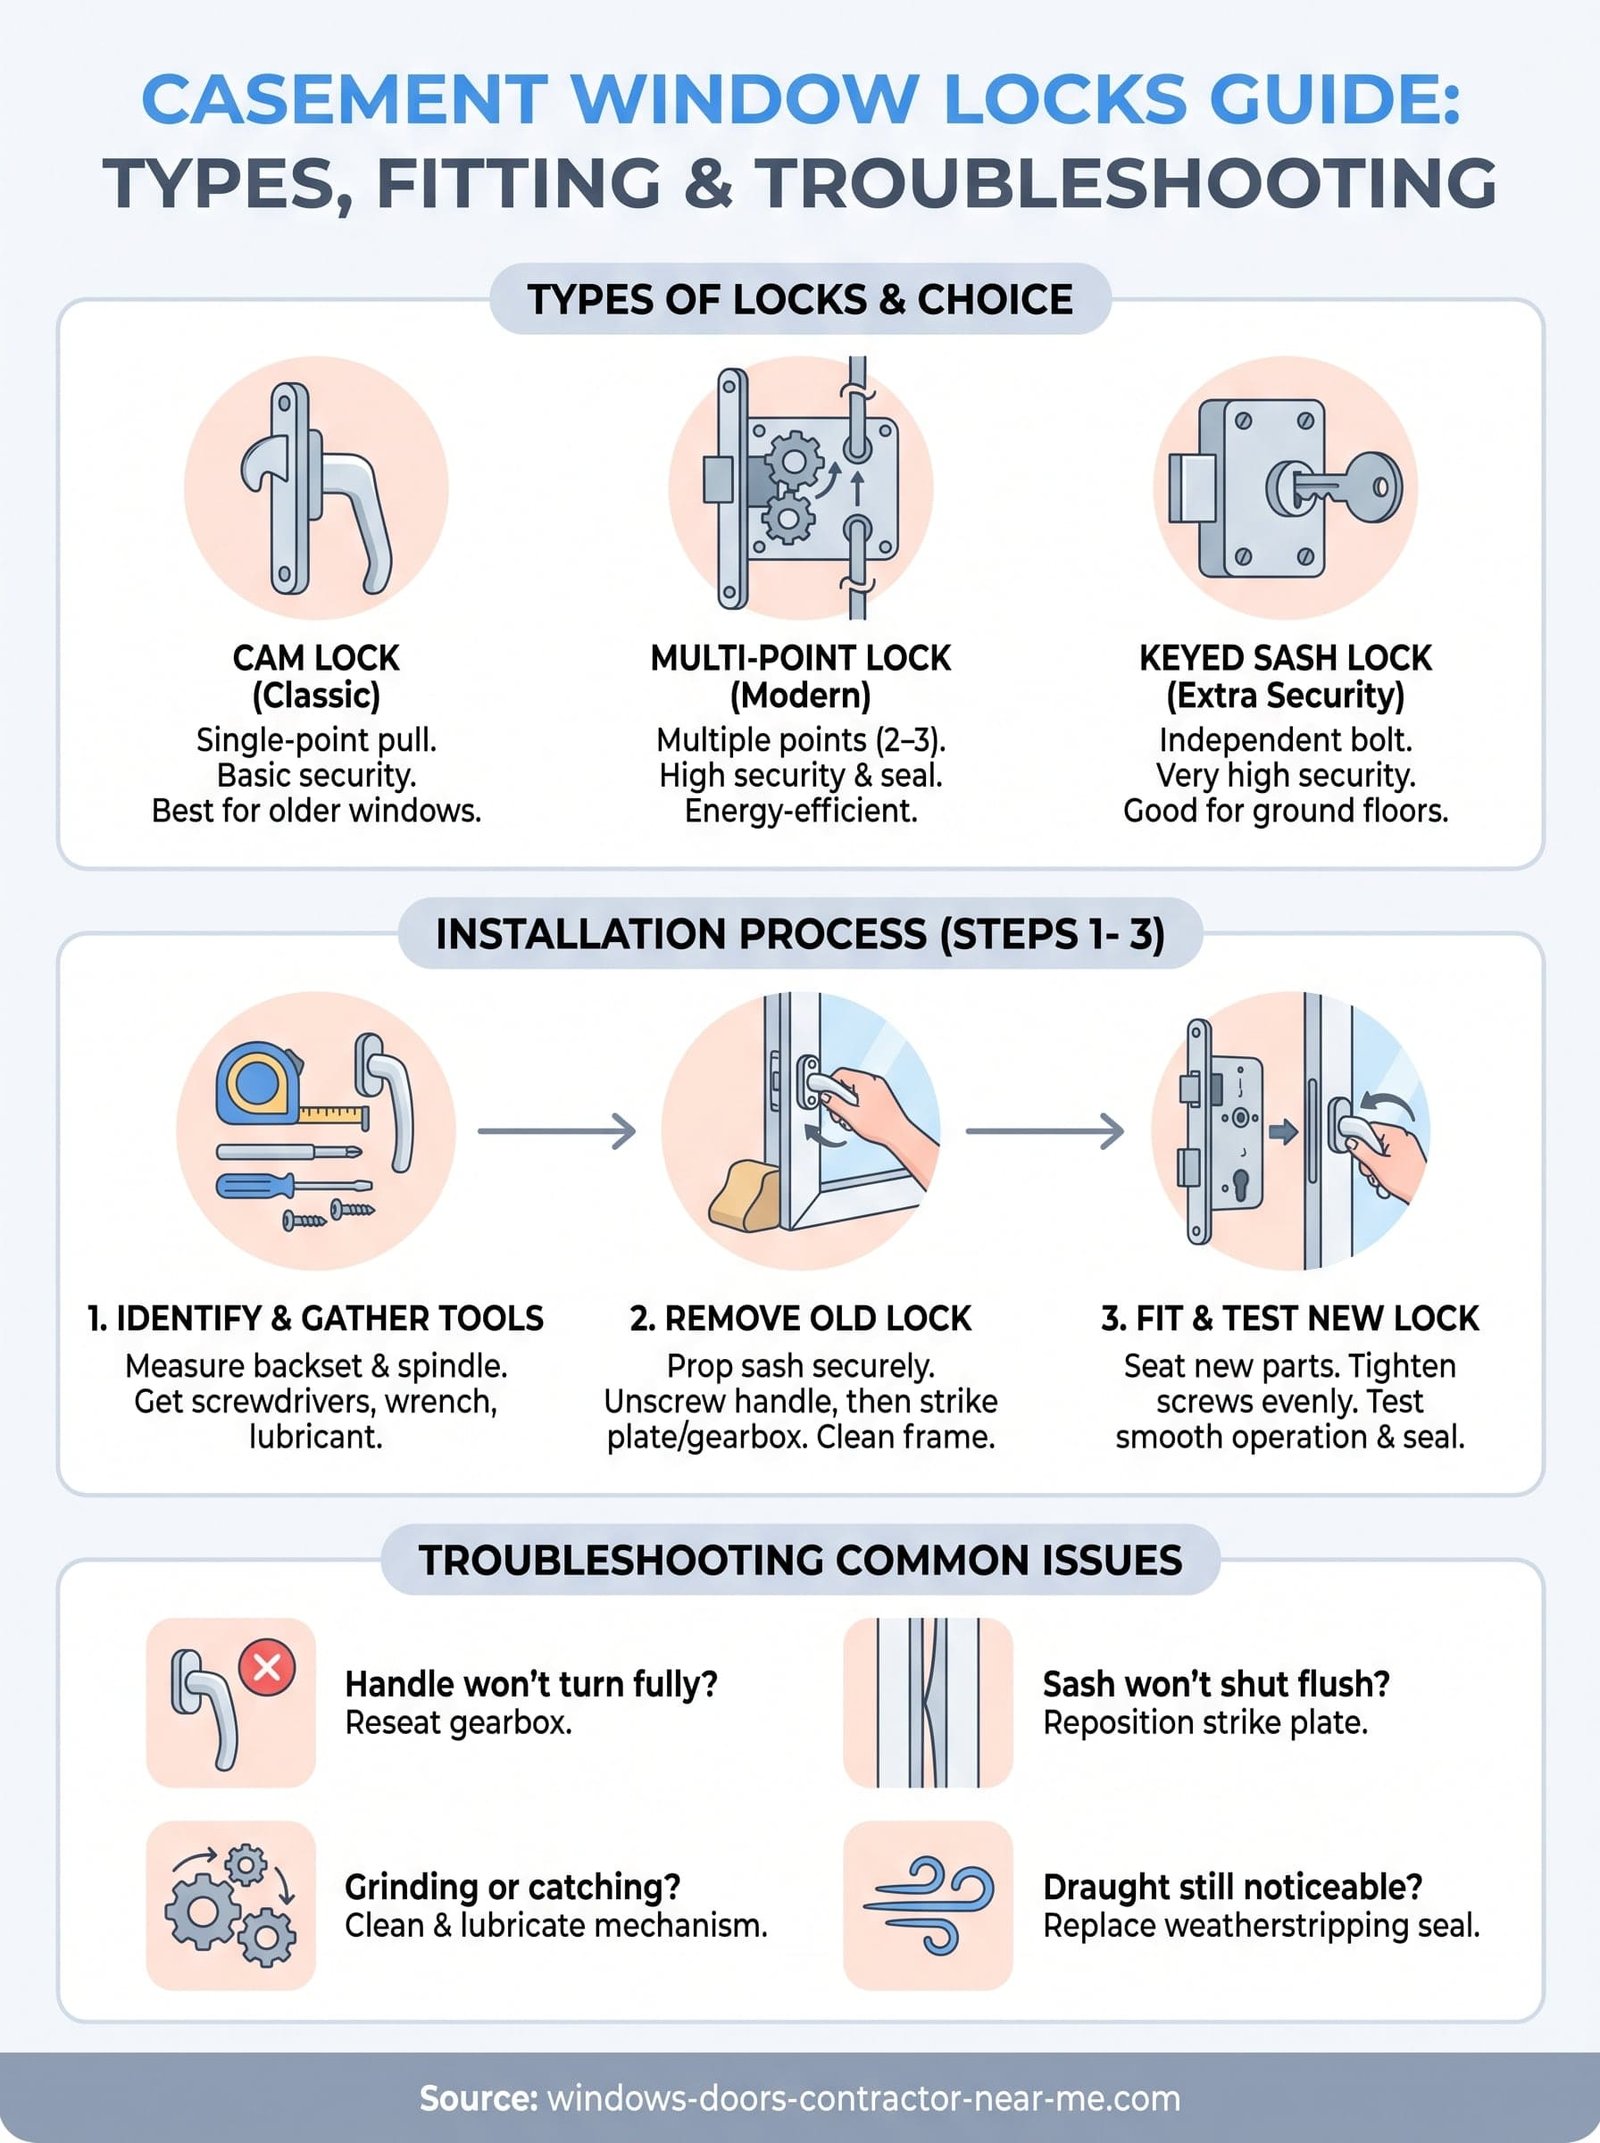
Types of casement window locks and how to choose one
Casement windows for Ontario homes swing open on hinges rather than sliding, so their locks pull the sash tight against the frame instead of just latching two panels together. Picking the right casement windows locks means matching the mechanism to how your window closes and how much force it needs to seal properly against weather and drafts.
Cam locks and cam handles
The cam lock is the classic choice on older casement windows. Turning the handle rotates a small hooked cam that pulls into a strike plate mounted on the frame, drawing the sash shut, much the same way a crank operator moves a casement sash. These are simple, cheap, and easy to replace, but they only pull the window tight at one point, so a warped frame or sagging sash can still let in draughts even with a new cam fitted.
Multi-point locking systems
Newer casement windows, including most of what we manufacture at MK Windows and Doors, use multi-point locks that engage at two or three spots along the sash edge at once, working on the same principle as our multi-locking handle sets for doors. You operate them with a single handle, but internally a gear mechanism pushes rods up and down to lock the top and bottom of the sash simultaneously. This spreads pressure evenly, which matters a lot in Ontario winters when uneven sealing means cold air finding its way through the gaps, one of the details behind choosing energy efficient windows for a Canadian home.
A lock that only grips one point on the sash will never seal as tightly as one that locks the whole edge.
Sash locks and security hardware
Some homeowners add a separate sash lock or keyed lock as a second layer of security, particularly on ground-floor windows. These bolt through the sash into the frame independently of the main handle mechanism, so even if someone forces the handle, the window stays shut.
Comparing your options
| Lock type | Best for | Security level | Typical cost |
|---|---|---|---|
| Cam lock | Older single-point casements | Basic | $10 to $25 |
| Multi-point lock | Modern energy-efficient windows | High | $40 to $90 |
| Keyed sash lock | Ground-floor or high-risk windows | Very high | $15 to $35 |
Before you buy anything, check whether your current hardware is single-point or multi-point, since swapping between the two usually means replacing more than just the lock itself. If you're unsure, our team can help you identify the correct part during a free consultation.
Step 1. Identify your lock type and gather tools
Before you order a replacement, work out exactly what's on your window now. Open the sash and look at the handle mechanism: if turning it moves a single hooked cam into one strike plate, you've got a cam lock. If the handle drives rods up and down inside the sash edge that engage at two or three points, you're dealing with a multi-point lock, and you'll need a matching gearbox rather than a generic handle.
Count the fixing screws holding the handle plate, measure the distance between them (this is called the backset), and note the spindle length connecting the handle to the mechanism. Photograph the old hardware from a few angles too. Suppliers, including our own team, can often confirm the correct replacement part just from a clear photo and the backset measurement.
Measure twice before you order, because a mismatched backset means the new handle simply won't line up with the mechanism.
Once you've identified the part, gather your tools. Most casement lock swaps need only basic kit:
- Phillips and flathead screwdrivers
- A small adjustable wrench
- A tape measure
- Replacement lock or handle assembly
- Silicone lubricant spray
- A rag and mild cleaner for the frame
If your window is under warranty, or if the mechanism is seized rather than simply worn, check your paperwork before you start removing screws. Forcing a stuck casement window lock can crack the sash or strip the fixing holes, turning a cheap repair into a full hardware replacement job.
Step 2. Remove the old casement window lock
Open the sash fully and prop it steady before you touch a screwdriver. Casement sashes swing on hinges, so once the handle is off there's nothing holding the window shut, and an unsupported sash can swing and strain the hinges or crack the glass. Wedge a soft cloth or foam block between the sash and frame to keep it in place while you work.
Work through the removal in order rather than pulling parts off randomly, since forcing anything out of sequence risks stripping screws or bending the strike plate:
- Unscrew the handle plate first, keeping the screws in a labelled cup or magnetic tray.
- Lift the handle away from the spindle, noting which way the spindle sits.
- Remove the strike plate or keeper from the frame.
- On multi-point systems, unscrew the gearbox cover along the sash edge and slide the rod mechanism free.
- Clean out any old sealant, paint, or debris from the screw holes before fitting anything new.
Never lever a stuck lock out with brute force, a cracked sash costs far more than the hardware you're trying to save.
Seized screws are the most common holdup here, especially on older window locks for casement windows that haven't been touched in years. A few drops of penetrating oil or silicone spray, left to sit for five minutes, usually frees a stubborn screw without stripping the head. If a screw still won't turn, switch to a manual screwdriver and steady, even pressure rather than a power drill, which can chew through soft aluminium or vinyl fixing points in seconds.
Step 3. Fit and test the new lock
Start by seating the new strike plate or keeper against the frame, using the old screw holes if they line up cleanly, or filling stripped holes with a toothpick and wood glue first so the new screws bite properly. Slide the multi-point gearbox or cam mechanism into the sash edge, making sure the rods sit flush and move freely before you drive in a single screw. Rushing this step is the main reason replacement locks feel stiff from day one.
Fit the handle onto the spindle next, checking that it sits square against the sash before tightening the fixing screws. Snug the screws down evenly rather than cranking one side fully tight first, since an uneven pull can warp the handle plate and bind the mechanism.
A new lock that binds on the first turn almost always means a fixing screw is pulled too tight, not a faulty part.
With everything screwed down, close the sash slowly and turn the handle through its full range. On a multi-point lock, you should feel the rods engage smoothly at each point without grinding or catching halfway. On a cam lock, the hooked cam should slide cleanly into the strike plate and pull the sash flush against the weatherstripping.
Test it a dozen times before calling the job done. Open and close the window fully, lock and unlock the handle, and check the sash sits flat against the frame with no visible gap. Run a hand along the seal for draughts. If the handle feels gritty rather than smooth, a quick spray of silicone lubricant on the moving parts usually sorts it out.
Troubleshooting common casement lock problems
Sometimes a fresh lock still doesn't behave, and the fault usually traces back to alignment rather than the hardware itself. A sash that's dropped slightly on its hinges, a strike plate that's a millimetre out of position, or leftover paint in the keeper can all stop an otherwise good casement window lock from seating properly. Before you assume the part is faulty, check the simple things first.
Most lock complaints after a fresh fit come down to alignment, not a bad part.
Grinding, gaps, or a handle that won't turn fully all point to specific, fixable causes. Work through the table below before you reorder hardware:
| Symptom | Likely cause | Fix |
|---|---|---|
| Handle won't turn fully | Rods misaligned in gearbox | Loosen fixing screws, reseat gearbox, retighten |
| Sash won't pull flush | Strike plate set too shallow | Shim or reposition the keeper slightly deeper |
| Grinding or catching | Debris or dried grease in mechanism | Clean with a dry brush, apply silicone spray |
| Draught still noticeable | Weatherstripping worn, not the lock | Replace the seal, not the hardware |
| Handle loose on spindle | Spindle too short or worn | Fit correct-length replacement spindle |
Winter cold snaps often expose problems that summer heat hides, since vinyl and aluminium frames contract slightly and throw alignment off by a hair. If you've worked through the table and the casement windows lock still won't sit right, the sash itself may have shifted on its hinges, which is a hinge adjustment job rather than a lock problem, and worth a professional look before you replace parts unnecessarily.
Keeping your casement windows secure
A worn handle or a rattling sash doesn't mean you need a whole new window. Most of the time, matching the right locks for casement windows to your existing mechanism and fitting it carefully solves the problem for a fraction of a full replacement cost. Cam locks suit older single-point windows, multi-point systems handle Ontario winters better, and a keyed sash lock adds peace of mind on ground-floor rooms, though bedroom windows also need to meet egress sizes and rules.
Getting the backset, spindle length, and lock type right before you order is what separates a fifteen-minute fix from a frustrating return trip to the hardware shop. If the sash itself has dropped or the frame's warped, no lock will seat properly until that's addressed first.
If you'd rather skip the trial and error, or your windows need more than a hardware swap, request a free quote from our Ontario window specialists for professional installation.