
Replacing a tired, drafty casement window sounds like a job you could tackle over a weekend, and with the right prep, it is. But get the measurements wrong or skip the shimming step, and you'll end up with a window that leaks air, sticks when you crank it open, or misses the energy performance an Ontario home needs altogether. Casement windows installation rewards patience and precision far more than it rewards speed.
This guide walks you through installing casement windows the way our licensed crews do it on job sites across Innisfil and the surrounding Simcoe area, from removing the old sash to setting the final bead of caulking. You'll learn how to check your rough opening, level and plumb the new unit, and insulate around the frame so it actually performs through a Canadian winter, not just look good on install day.
We'll cover the tools you need, the order of operations that prevents costly mistakes, and the warning signs that tell you it's time to call in a professional installer instead of finishing the job yourself. If you'd rather skip the ladder and the caulk gun entirely, we'll also point you toward what a proper factory-direct installation looks like.
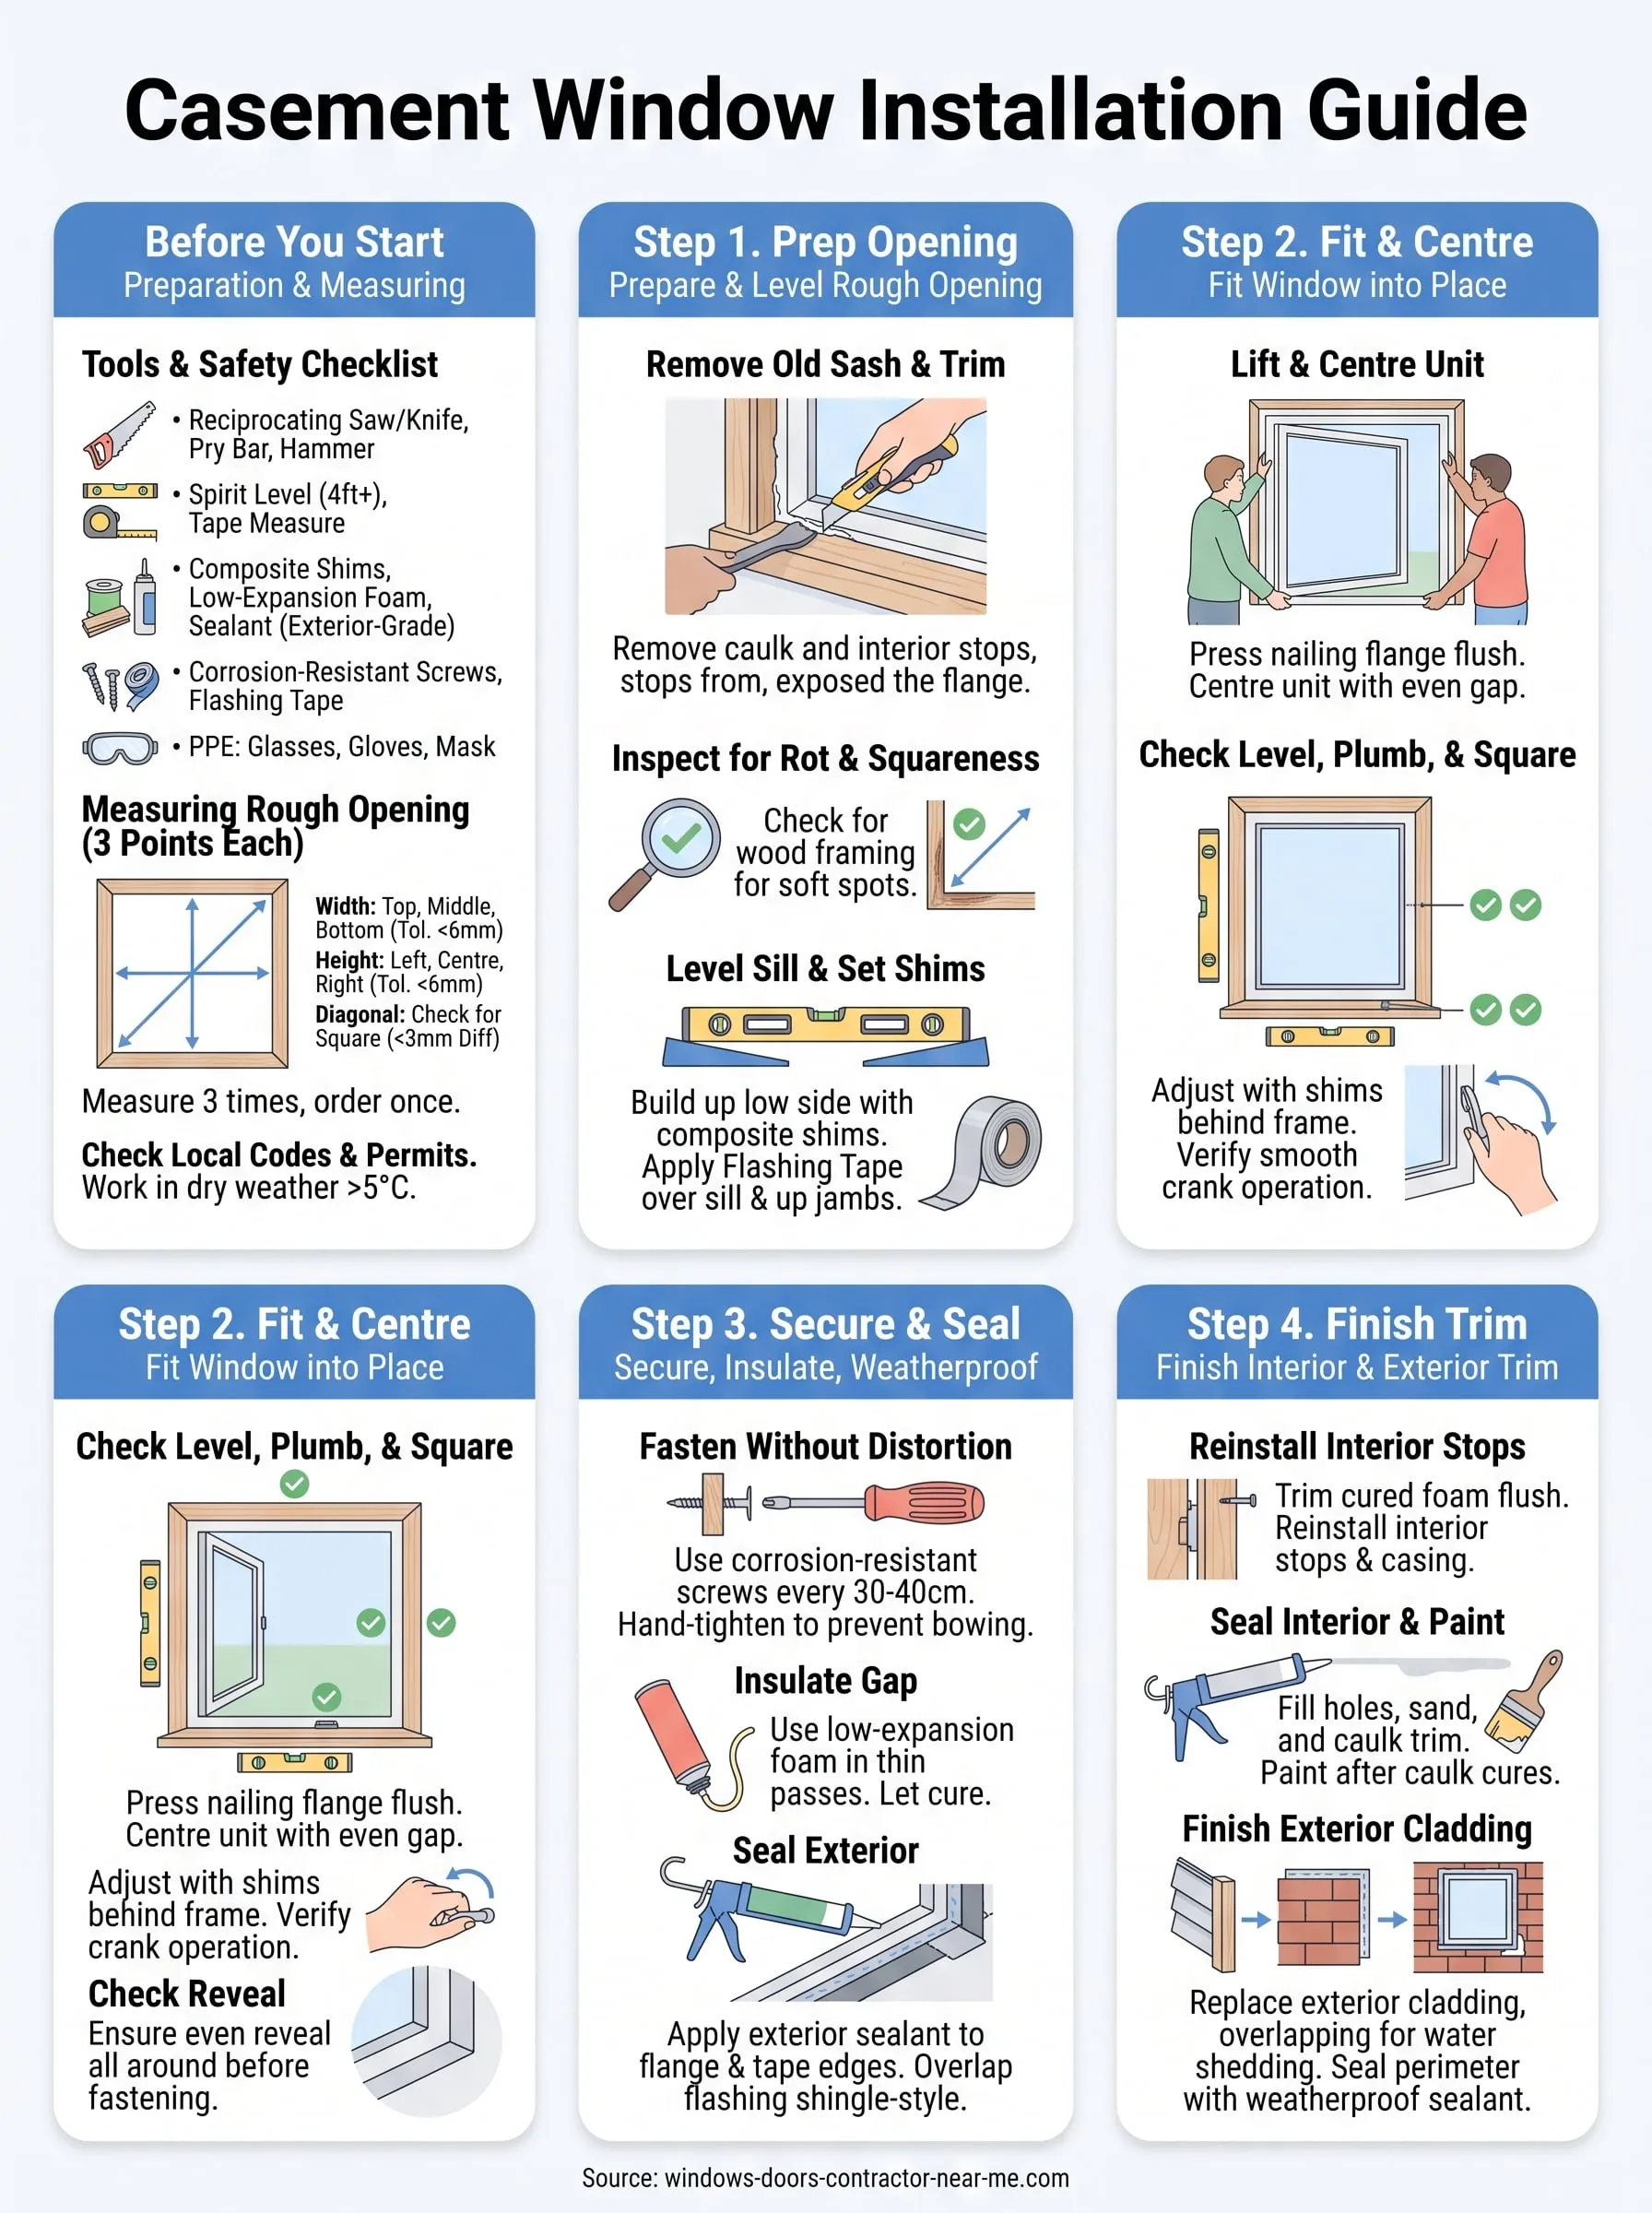
What you need before you start
Getting ready properly saves you from a mid-project trip to the hardware store, or worse, a window that won't seat square. Before you touch a pry bar, walk through your rough opening measurements, confirm the new casement unit built for your home matches those dimensions within a quarter inch, and lay out every tool within arm's reach. Rushing this stage is where most DIY installs go wrong, not the actual mounting.
Tools and materials checklist
Have everything on hand before you remove the old sash. A trip mid-job to buy shims or caulk means an open wall exposed to weather and pests.
- Reciprocating saw or utility knife (for cutting out old caulk and nailing fins)
- Pry bar and hammer
- Level (4-foot minimum) and tape measure
- Composite or cedar shims
- Low-expansion spray foam insulation
- Exterior-grade sealant or caulking rated for Canadian temperature swings
- Corrosion-resistant screws or nails
- Flashing tape
- Safety glasses, gloves and a dust mask
Measuring your rough opening
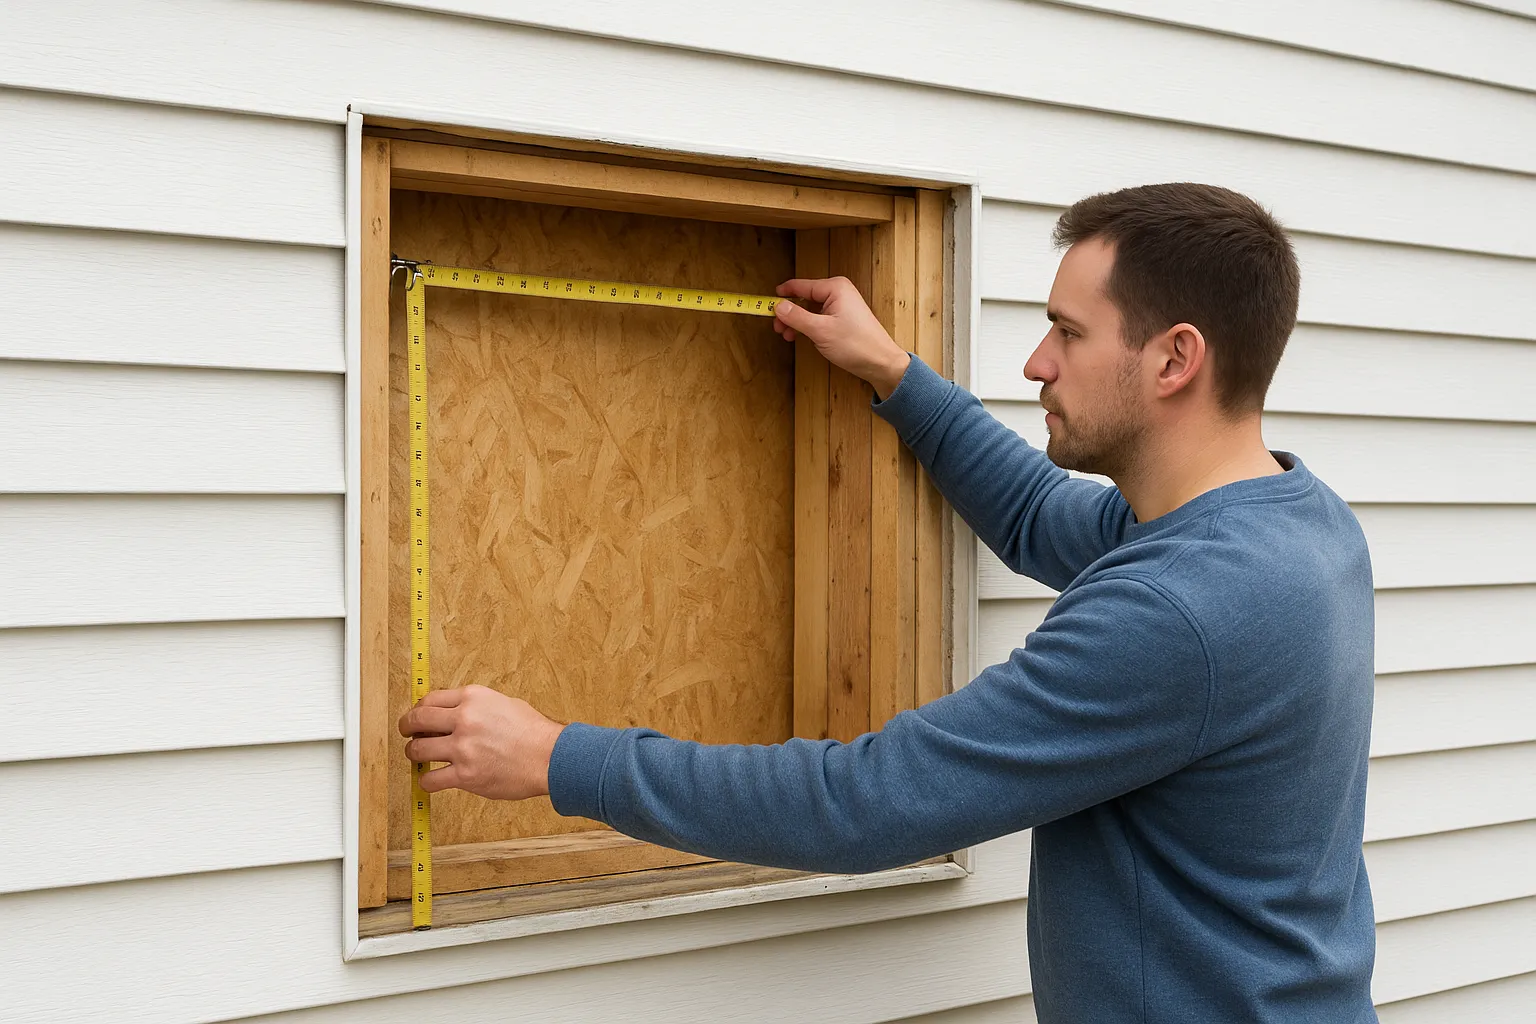
Measure the width and height of the existing opening in three places each, top, middle and bottom for width, and left, centre and right for height. Use the smallest of the three measurements when ordering a casement replacement window, since a window that's slightly small is fixable with shims, but one that's too big won't fit at all.
| Measurement point | Tolerance | Why it matters |
|---|---|---|
| Width (3 points) | Within 1/4 inch | Prevents binding on hinges |
| Height (3 points) | Within 1/4 inch | Keeps sill level for drainage |
| Diagonal (both corners) | Difference under 1/8 inch | Confirms the opening is square |
A window is only as good as the opening you set it into, so measure three times before you order once.
Safety, permits and weather window
Ontario building codes generally don't require a permit for a like-for-like window replacement, but confirm with your local municipality if you're changing the size of the opening or the structural header. Verify this against your municipality's requirements, and check the Ontario Building Code guidance published by the province at ontario.ca if you're unsure.
Pick a work window with dry weather and daytime temperatures above 5°C, since spray foam and caulk both need above-freezing conditions to cure properly. If you'd rather skip the prep entirely, MK Windows and Doors offers free in-home consultations where our crew handles measuring, ordering and installation as one job.
Step 1. Prepare and level the rough opening
Start by cutting away the old caulk bead with a utility knife, then pry out the interior trim and stops to expose the nailing flange. Removing the sash carefully avoids damaging the surrounding drywall or siding, since you'll likely reuse those finish pieces once your casement window installation is complete.
Inspect the framing for rot and square
Once the old unit is out, check the wood framing for soft spots, water staining, or insect damage. Press a screwdriver into the sill and jack studs; if it sinks in easily, replace that section before continuing. Confirm the opening is still square by measuring both diagonals again, since a difference under 1/8 inch means you're clear to proceed.
A rotten sill under a new window guarantees you'll be doing this job again in five years.
Level the sill and set shims
Next, dry-fit a level across the sill from side to side and front to back. If it's out by more than 1/4 inch, build up the low side with composite shims until it reads true, since proper water drainage depends on a level sill. Tack the shims with a dab of construction adhesive so they don't shift when you lift the window into place.
Finally, run a continuous strip of flashing tape across the sill and up both jambs before the new unit goes in. This barrier directs any water that gets past the exterior caulk back outside rather than into your wall cavity, which matters most during Ontario's freeze-thaw cycles.
Step 2. Fit the casement window into place
With the opening prepped and flashed, you're ready for the trickiest part of casement windows installation: getting the unit lifted, centred and held steady while you check it from every angle. Grab a second pair of hands here. A standard casement unit isn't heavy, but wrestling it alone while trying to keep it plumb almost always ends in a scratched frame or a dented sill.
Lift and centre the window
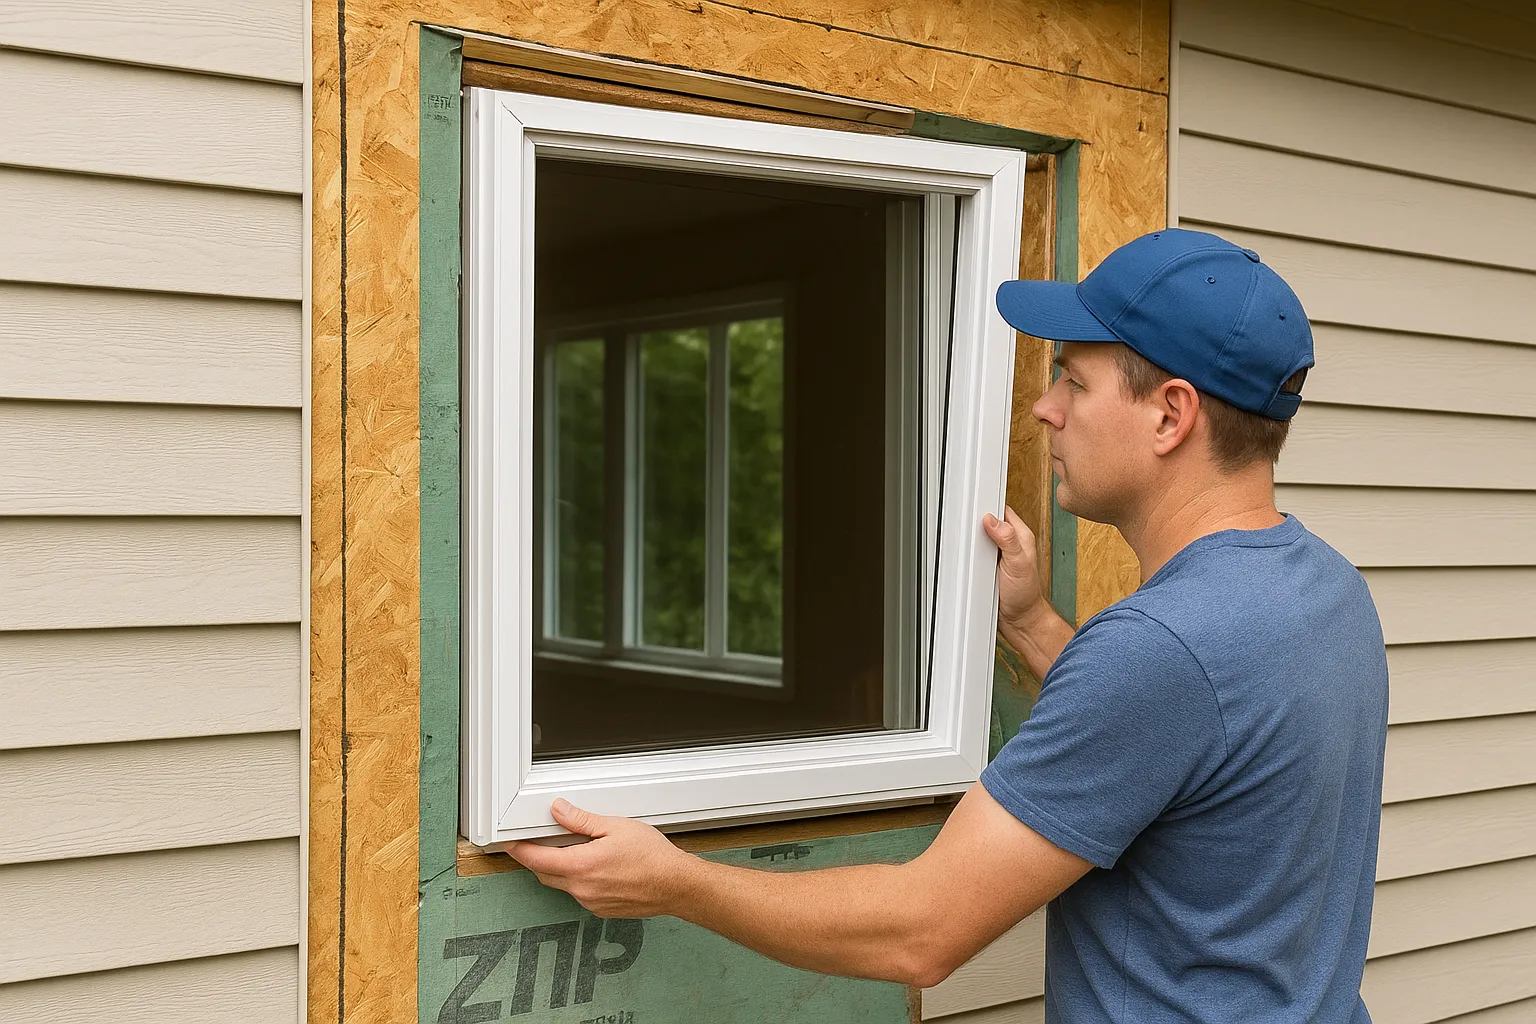
Set the bottom of the frame on the sill first, then tilt the top into the opening and press the nailing flange flush against the exterior sheathing. Centre the unit side to side so the gap between frame and rough opening is even on both jambs, typically leaving around a quarter inch for shimming. Have your helper hold the window steady from outside while you move inside to check fit, since even a slight lean at this stage throws off everything that follows.
Check level, plumb and square
Place your level against the side jamb, then across the head and sill. Adjust with shims behind the frame, not by forcing the unit itself, until all three readings come back true. Open and close the casement sash through its full range before you drive a single fastener; if it binds, drags, or won't latch cleanly, the frame is still out of square somewhere, or a casement window part needs a closer look.
A window that operates smoothly before you've fastened it will still operate smoothly ten winters from now.
Finally, check the reveal, the visible gap between the sash and frame, all the way around. An uneven reveal usually means a shim needs adjusting before you move on. Getting installing casement windows right at this stage means the fastening step in Step 3 is quick and stress-free rather than a fight against a crooked frame.
Step 3. Secure, seal and weatherproof the window
Once the frame reads level, plumb and square, drive your first fastener through the jamb and into the shim stack, not just the drywall or siding behind it. Corrosion-resistant screws hold better than nails over the long term, especially once condensation starts working its way into the wall cavity each winter. Work from the top corners down, checking level after every second screw, since even a well-shimmed frame can twist slightly under fastening pressure.
Fasten without distorting the frame
Space fasteners every 12 to 16 inches around the perimeter, and snug each one down by hand rather than with a power driver on full torque. Overdriving a screw bows the jamb inward, which is the single most common cause of a casement window installation that sticks the moment cold weather arrives. Open and close the sash again after every few fasteners to catch the problem early.
A screw driven too tight will cost you more in binding hinges than the two extra minutes it takes to check by hand.
Insulate the gap and seal the exterior
Fill the perimeter gap between the frame and rough opening with low-expansion spray foam, working in thin passes rather than one thick fill, since standard foam can bow the jamb just like an overdriven screw. Let each pass cure before adding more. Once the interior gap is sealed:
- Run a bead of exterior-grade caulk around the nailing flange where it meets the sheathing
- Tape over the flange edges with flashing tape, lapping shingle-style so water sheds downward
- Check the sill flashing you installed in Step 1 is still fully covered
This combination of foam, caulk and flashing tape is what actually keeps Ontario's freeze-thaw cycles from finding a way into your wall.
Step 4. Finish the interior and exterior trim
Once the spray foam has cured fully, usually within 24 hours, slice away the excess with a utility knife so it sits flush against the jamb. Overflowing foam left in place traps moisture behind the trim and eventually rots the wood you just protected. Trim first, caulk second, that order keeps every layer doing its job in your casement windows installation.
Reinstall interior stops and casing
Nail the interior stops and casing back into the jamb rather than the surrounding drywall, keeping the same even reveal you checked back in Step 2. Fill nail holes with wood filler, sand once dry, then caulk the seam between casing and wall with a paintable interior sealant. Paint or stain to match the rest of the room only after the caulk has fully cured, typically another 24 hours.
Trim done well hides every shim and screw underneath it, so nobody but you will ever know how much work went into a straight reveal.
Finish the exterior cladding
Outside, replace any siding, brick mould or capping you removed during teardown, overlapping each piece so water always sheds downward and away from the frame. Seal the perimeter where the new trim meets the existing cladding with an exterior-grade sealant rated for Canadian temperature swings, since this joint takes the brunt of wind-driven rain each autumn. Verify the sill pan and bottom corners last, because water infiltration almost always starts at a poorly sealed corner rather than the flat run of trim. A finished job for installing casement windows should look, from the street, like the window was always there, not like something bolted on last weekend.
Getting the result you want
A well-installed casement window shouldn't need a second thought once the caulk cures. It should crank open smoothly, seal tight against January wind, and shed water off every corner without a drip finding its way into your wall cavity. That's the standard to hold yourself to, not just a window that looks fine from the driveway. Casement windows installation done properly means checking level, plumb and square at every stage, not just at the end when it's harder to fix mistakes.
If any step in this guide feels like more risk than you're willing to take on your own home, that's a fair call. A botched seal costs far more in energy bills and rot repair than a professional install ever would. MK Windows and Doors has been manufacturing and fitting windows across Innisfil and Ontario since 2006, backed by a 15-year seal failure warranty. Book a free in-home casement installation consultation and let our licensed crew handle the measuring, the fitting and the guarantee.